Grub Customizer is an open source tool to configure the Grub 2 boot-loader appearances and settings with a simple graphical interface.
With Grub Customizer, you can easily:
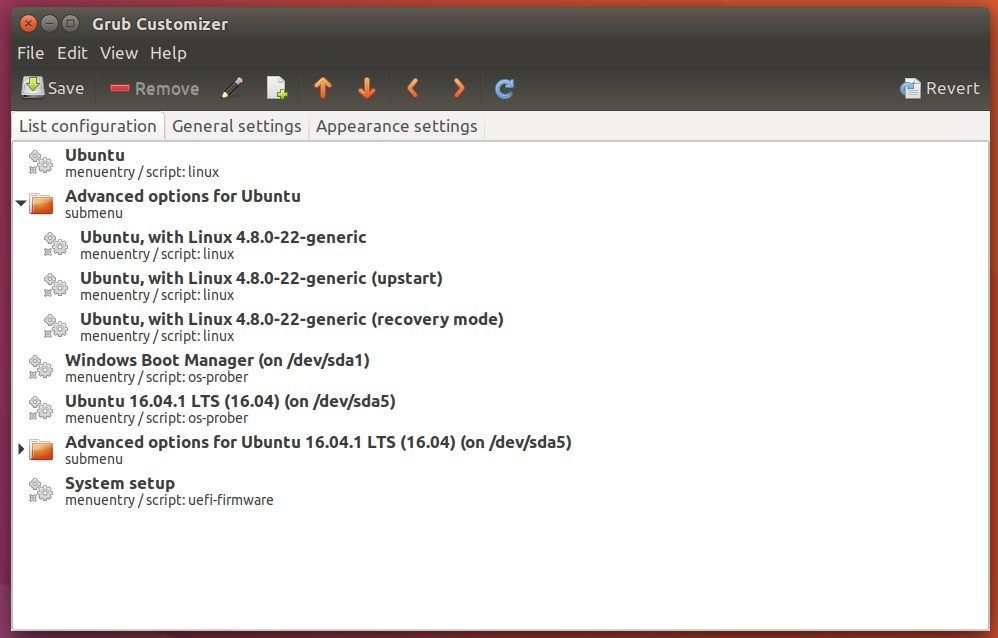
- add, remove, edit, rearrange Grub menu entries.
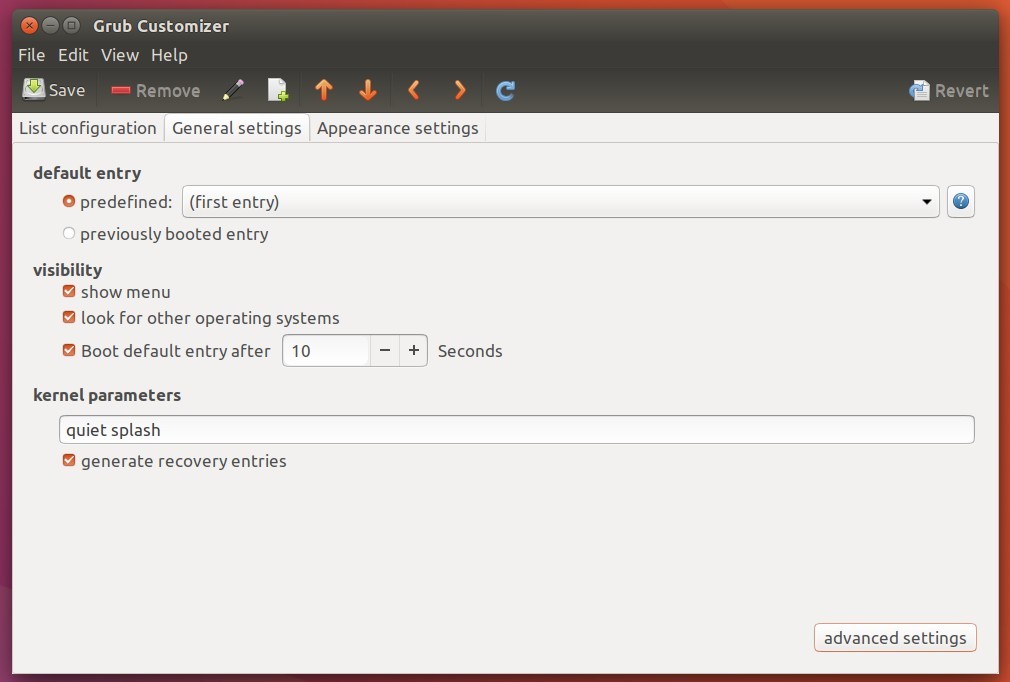
- Change default entry, visibility, timeout, kernel parameters.
- Change the resolution, background image, edit the font and color, etc.
- Reinstall Grub into MBR, so to load Ubuntu from Windows boot-loader
Install Grub Customizer via PPA:
The developer has made this handy tool into PPA available for all current Ubuntu releases and derivatives. To install it, from the steps below:
1. Open terminal (Ctrl+Alt+T) and run command to add the PPA:
sudo add-apt-repository ppa:danielrichter2007/grub-customizer
Type in your password (no visual feedback) when it prompts and hit Enter.

2. Update the package index and install the software via commands:
sudo apt update
sudo apt install grub-customizer
For those who don’t want to add PPA, grub the latest .deb from the PPA file archive.
- grub-customizer_5.0.6-0ubuntu1~ppa1y_amd64.deb for 64-bit Ubuntu 16.10.
- grub-customizer_5.0.6-0ubuntu1~ppa1y_i386.deb for 32-bit Ubuntu 16.10.
And double-click to install the package via Ubuntu Software.
Uninstall Grub Customizer:
To uninstall the software, use apt command with remove option, and use autoremove to remove all unnecessary dependencies:
sudo apt remove grub-customizer && sudo apt autoremove
The PPA can be removed by going to System Settings -> Software & Updates -> Other Software tab.