This tutorial shows how to burn an Ubuntu .iso image into an USB stick, so you can boot into Live Ubuntu system by plugging it in any computer.
An Ubuntu Live-USB is useful when your machine won’t boot. With it, you can:
- install Ubuntu on a computer
- re-install/restore Grub bootloader when you get boot errors e.g. “Grub rescue>”, “Error 17”.
- reset forgotten passwords for Windows or Linux OSes on this computer
- backup data from the disk
- and more.
Requirements:
- An USB stick with 2GB+ memory.
- A computer running with Windows, Linux, or Mac OS X.
To get started:
1. Download Unetbootin executable, a graphical tool to create bootable Live USB drives for Linux.
For Ubuntu, Unetbootin is available for install in Ubuntu Software Center.
2.(Optional) Download Ubuntu .iso image from the link below:
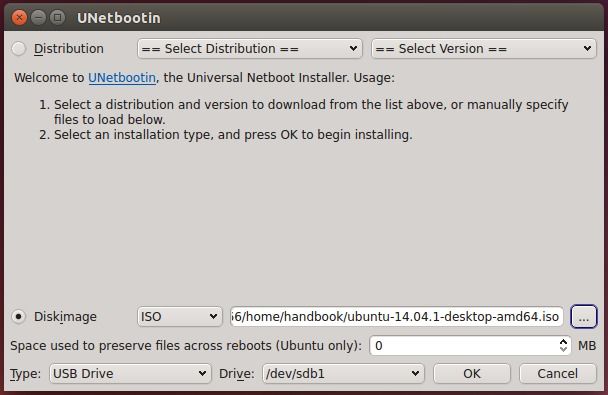
3. Plug-in your USB stick and then start Unetbootin. When it opens, do:
- If you skipped step 2, select Ubuntu and its version from drop-down lists after Distribution. After clicking OK, it automatically downloads the Ubuntu .iso and burns it into USB.
- If you have downloaded an .iso, check Diskimage and choose the image file from your computer.
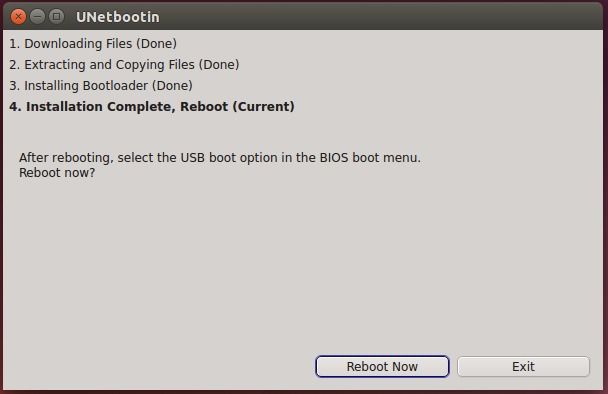
4. After clicking OK button, it starts burning Ubuntu into your USB stick.

5. Once done, you can see something like below asks you to exit/restart and select boot with USB in BIOS.
That’s it. Enjoy!